For my custom mechanical keyboard I wanted to match the shape of my existing keyboard exactly.
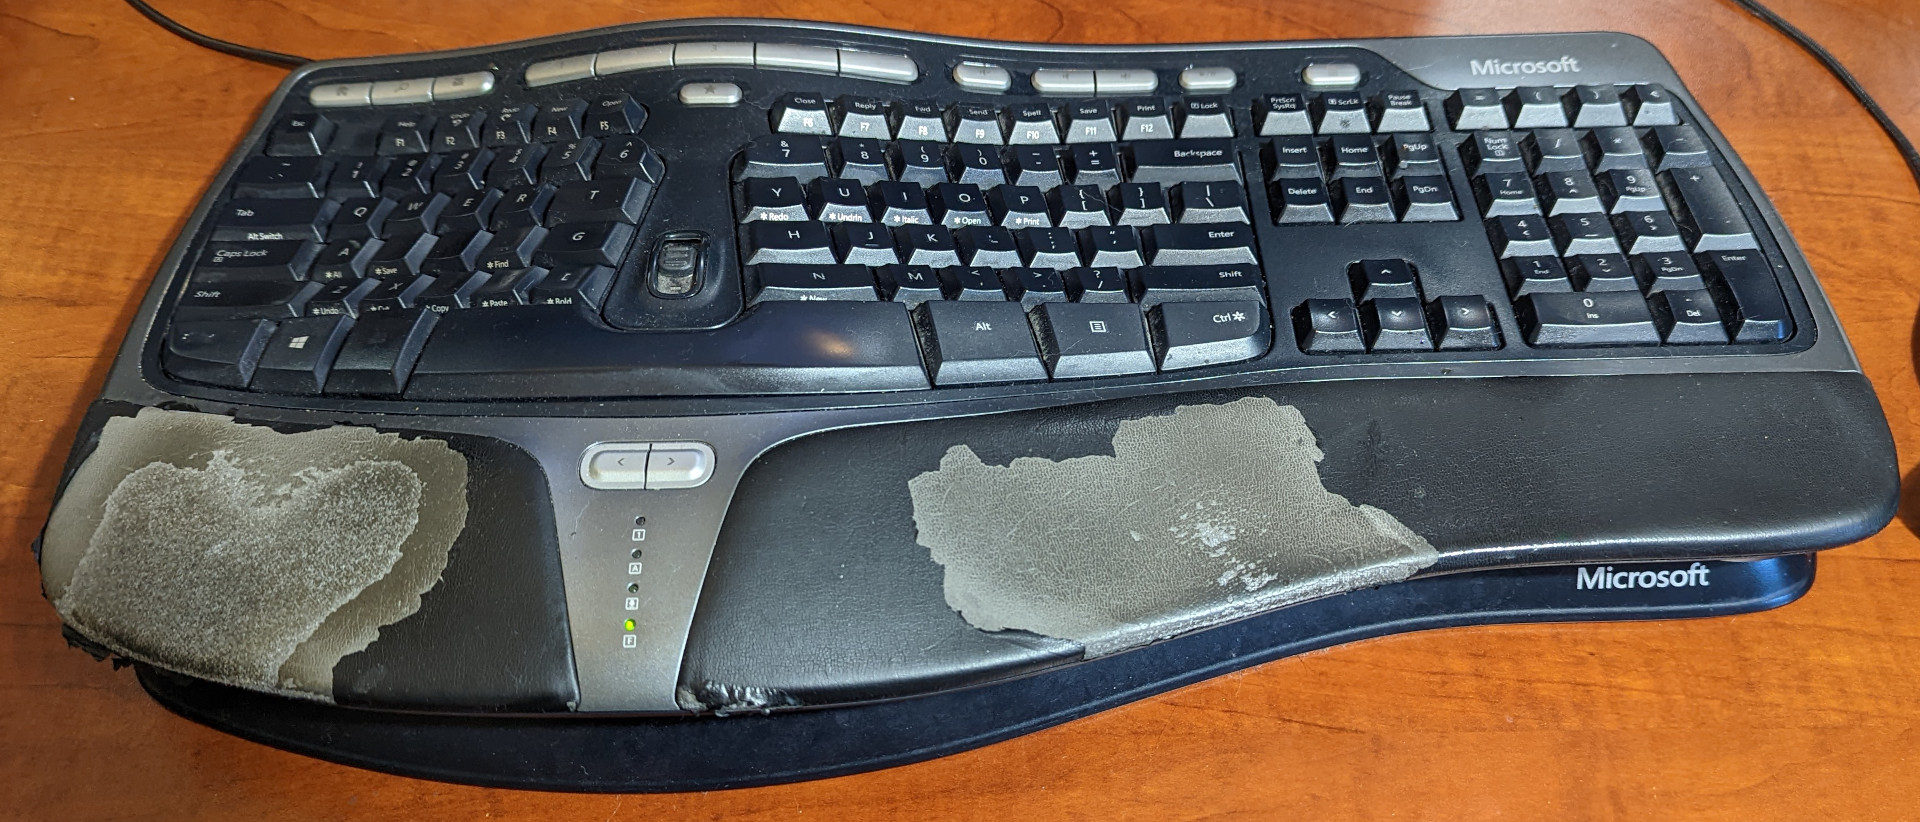
I found the photogrammetry software, Meshroom. Just with my phone I took some photos of my old natural 4k and used Meshroom to create a 3D model of it. The ease of use of this software out of the box is just incredible. Drag in the images, click go and wait.
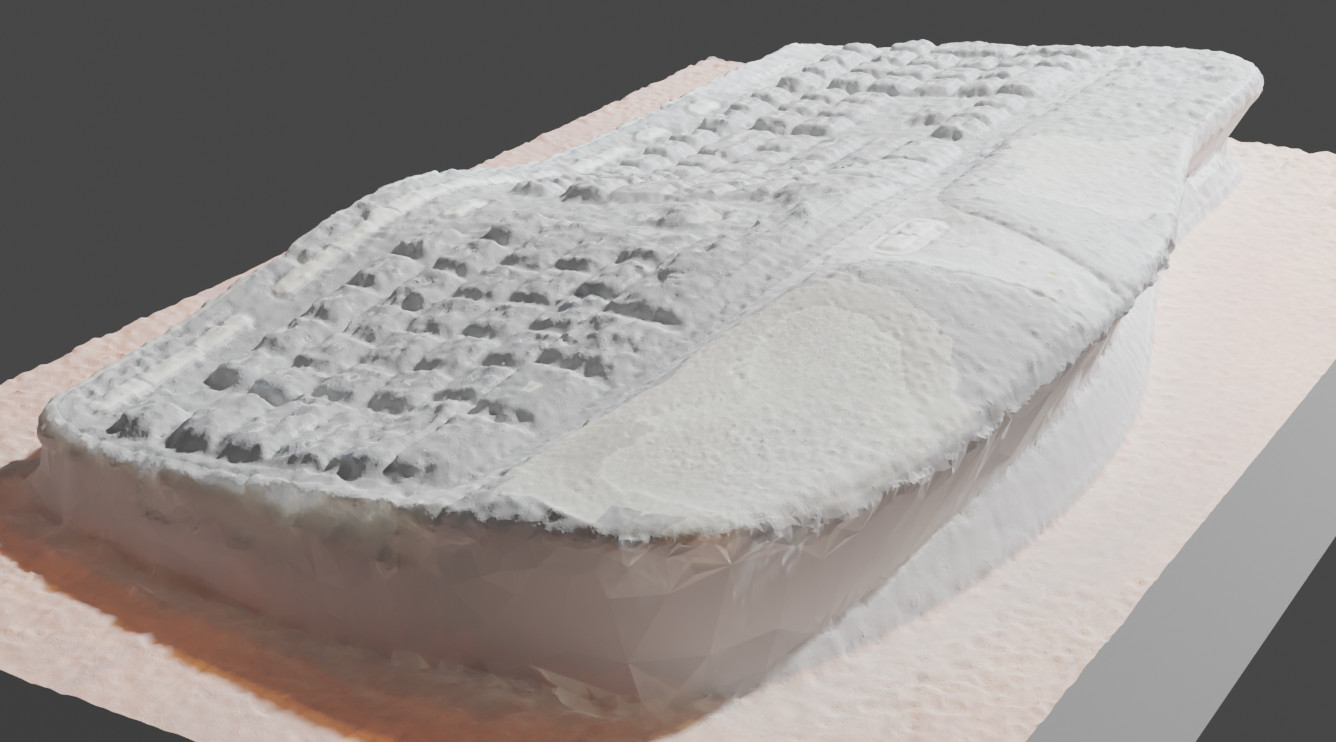
The Meshroom output was a big, a bit noisy and not aligned to any ground plane. I did some cleanup in blender. Notably, using this planefit.py plugin (blog) to create a ground plane, snapping an “empty” to it, parenting and un-parenting the empty but keeping the transform and zeroing the object’s rotation to align it.
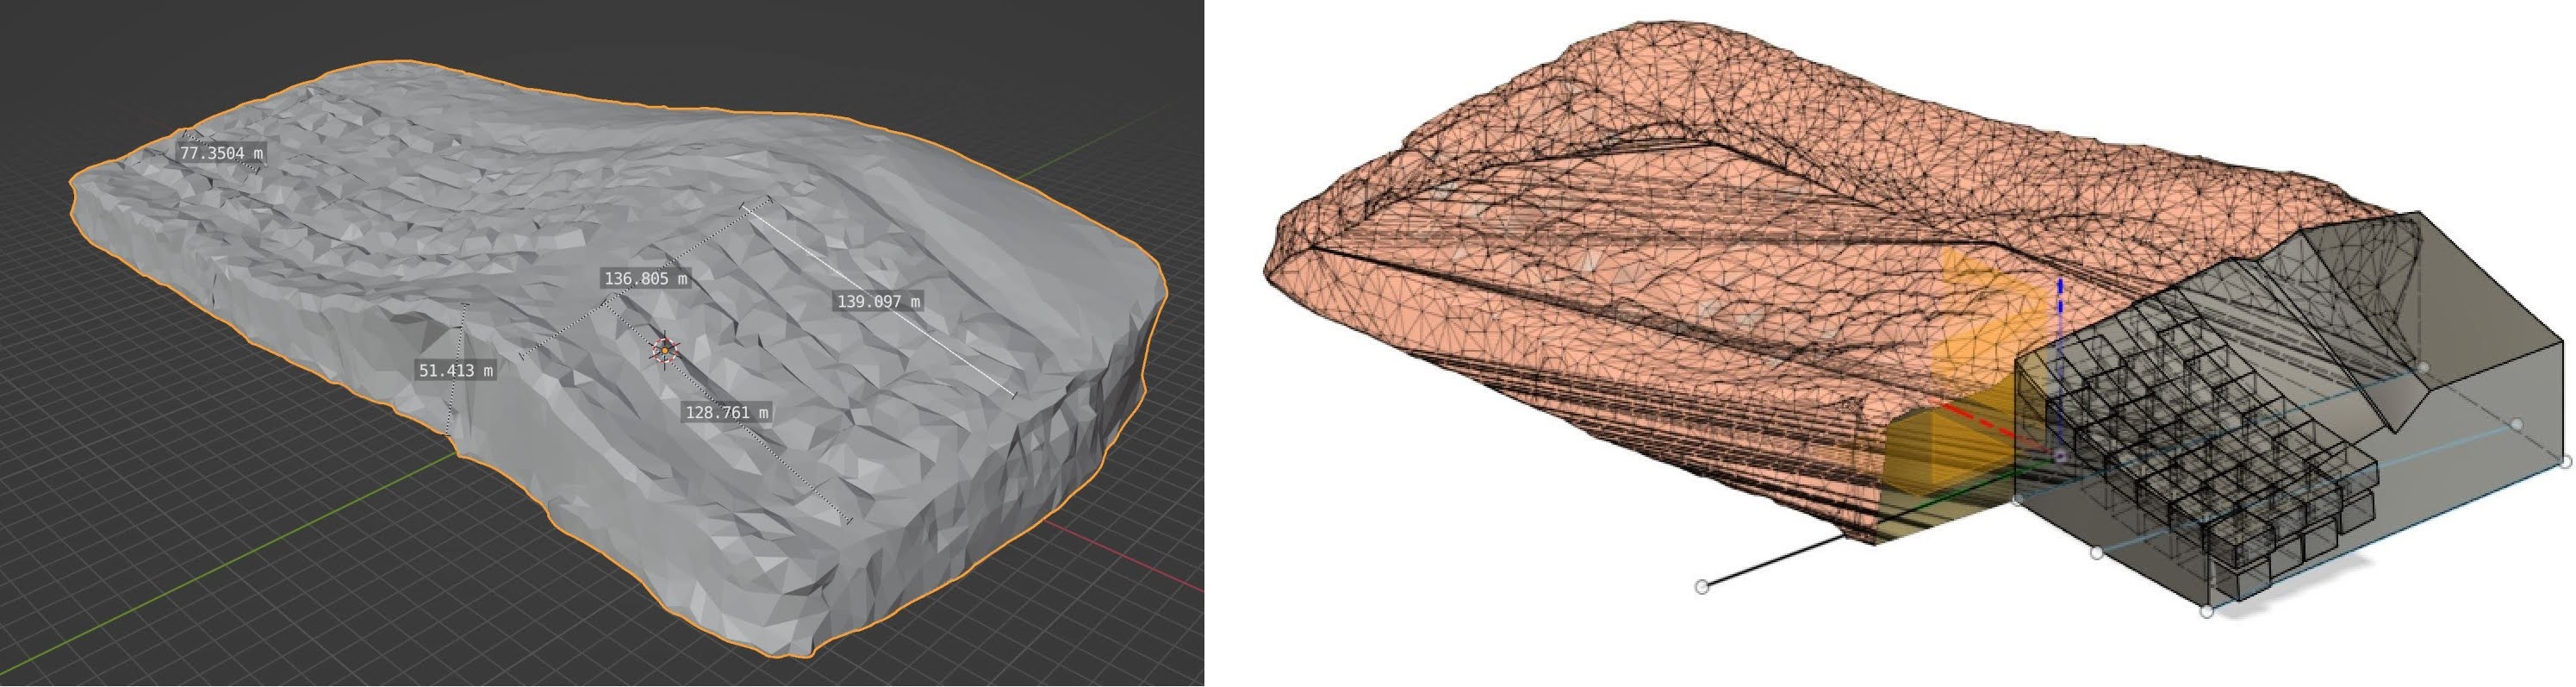
It turns out this was actually the easy bit. I had designed the key holder already and now I needed to place them in 3D before joining them together. I needed to have the whole layout of all the keys in Fusion360 so I could export a single model and 3D print it. Importing the keyboard mesh from blender was straight forward. I refined the scale, matching measurement some I’d taken from the real keyboard (see the image below). Now the tricky bit is Fusion360 does not really allow interacting with triangle meshes. I couldn’t find a way to create any construction objects relative to mesh vertices or faces in order to place my key holders with the align tool.
Now, I love Fusion360. It’s free, so easy to start using, and having an editable history is a godsend. It can be super frustrating at times when it’s slow and buggy — never ever use Copy Paste Bodies. One frustrating thing about Fusion360 is the total lack of arbitrary transform support. You can move objects along axes defined by their own edges but there’s not always an edge in the direction you want and one node in the history per axis is clunky. It does have an arbitrary x, y, z move tool but editing those in the history is broken as the reference orientation is lost. And don’t get me started on accidentally moving a component and getting random “capture component positions” strewn through the history. This would not do for positioning every key individually.
My first real attempt was to cut the imported mesh in a few places with a construction planes, then create some silhouette sketches on each cut and loft them together. The lofts generated nice curved paths in 3D for each vertex and I made sure to have one for each row of keys. Then used the pattern tool to place key holders along the path. This was so close to what I wanted but I had no control over the key alignment, the rotation about the path. The distance between the paths was also inconsistent and simply dependent on the loft algorithm.
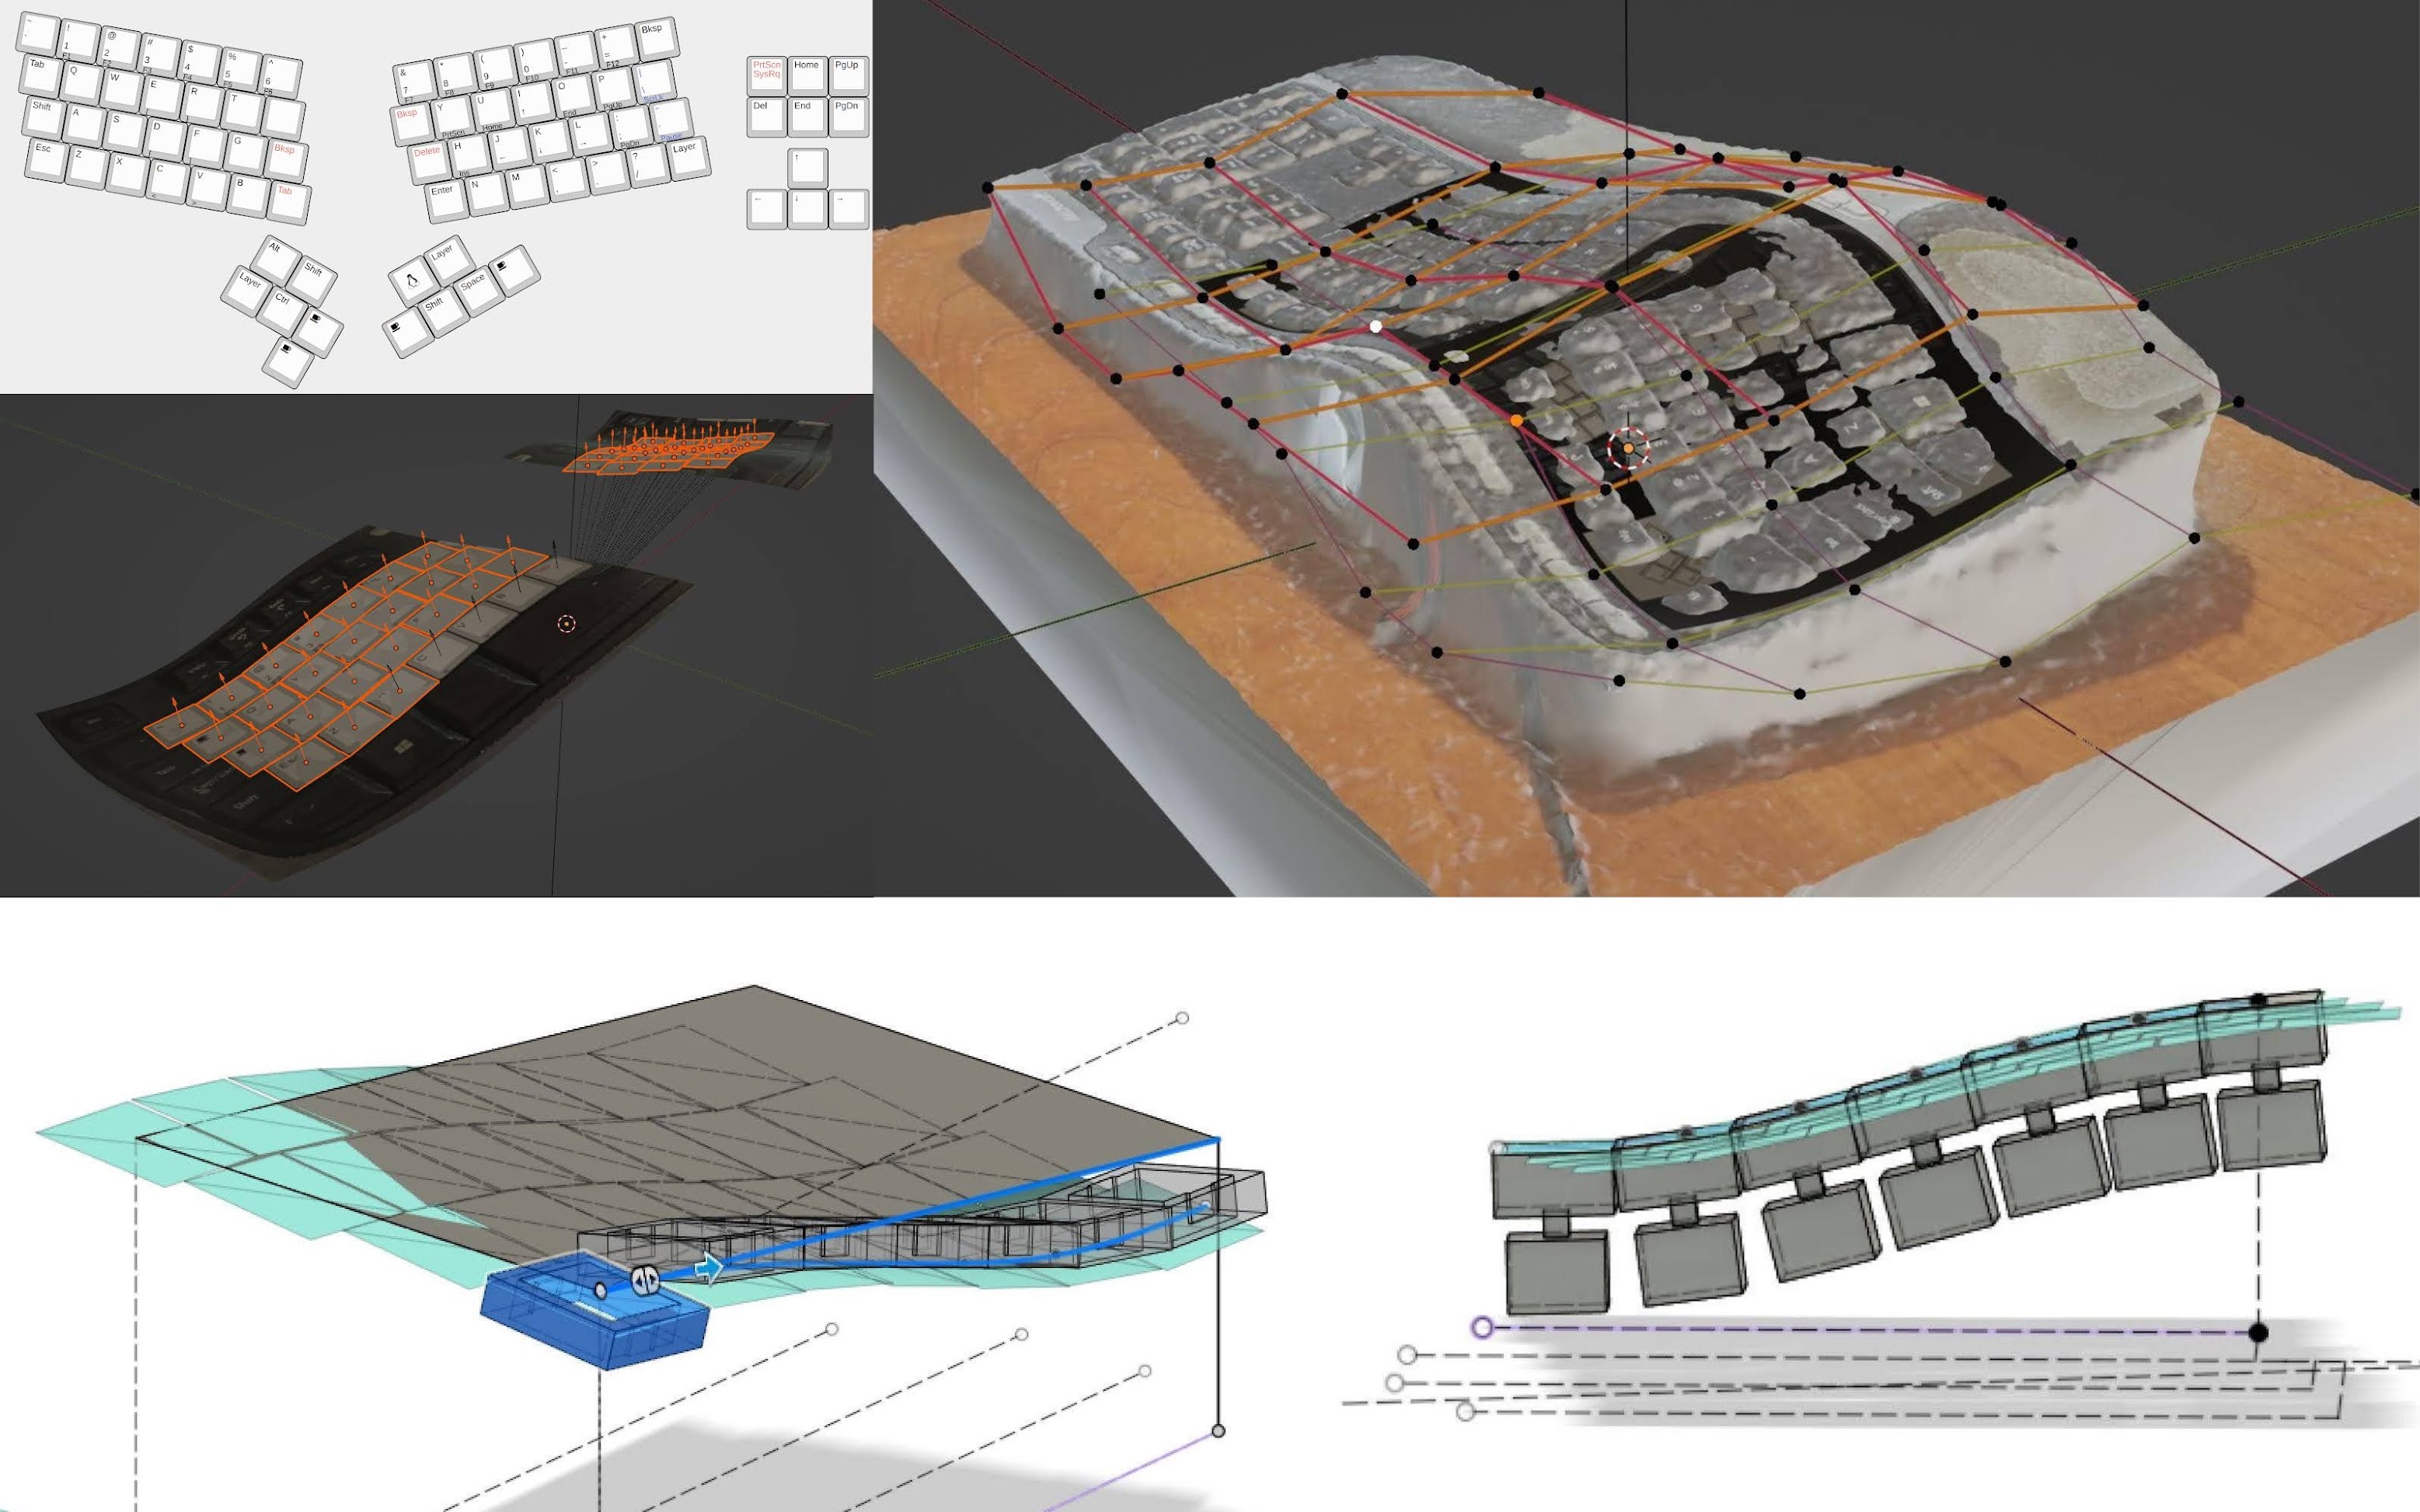
I tried something else. I had a vague idea that I wanted to make some kind of curved plane to match the MS Natural 4K, then place my keyboard layout over it and copy my key holder design to all the keys. I used blender to model some NURB patches, then apply my keyboard-layout-editor.com layout as a texture and finally snap some quads at the location of each key. See above. Boy if only I remembered Fusion360 wouldn’t be able to do anything useful with these, hey. I was too optimistic. I imported the quads as a mesh. Unlike last attempt I now had precise locations I wanted each key at along with a plane to align to, just no way to get Fusion360 to use them. I played around with, creating paths on construction planes, trying to use pattern on path, but still struggling with alignment. Another important cosideration was this:
The key rows of the MS Natural 4K curve in multiple directions
It’s subtle, I could probably do without but I decided I needed this level of control. Creating a path on a plane was not going to work since the path would need to curve away from the plane in some places. Finally I had a Fusion360 epiphany: I would extrude two curved paths and intersect them.
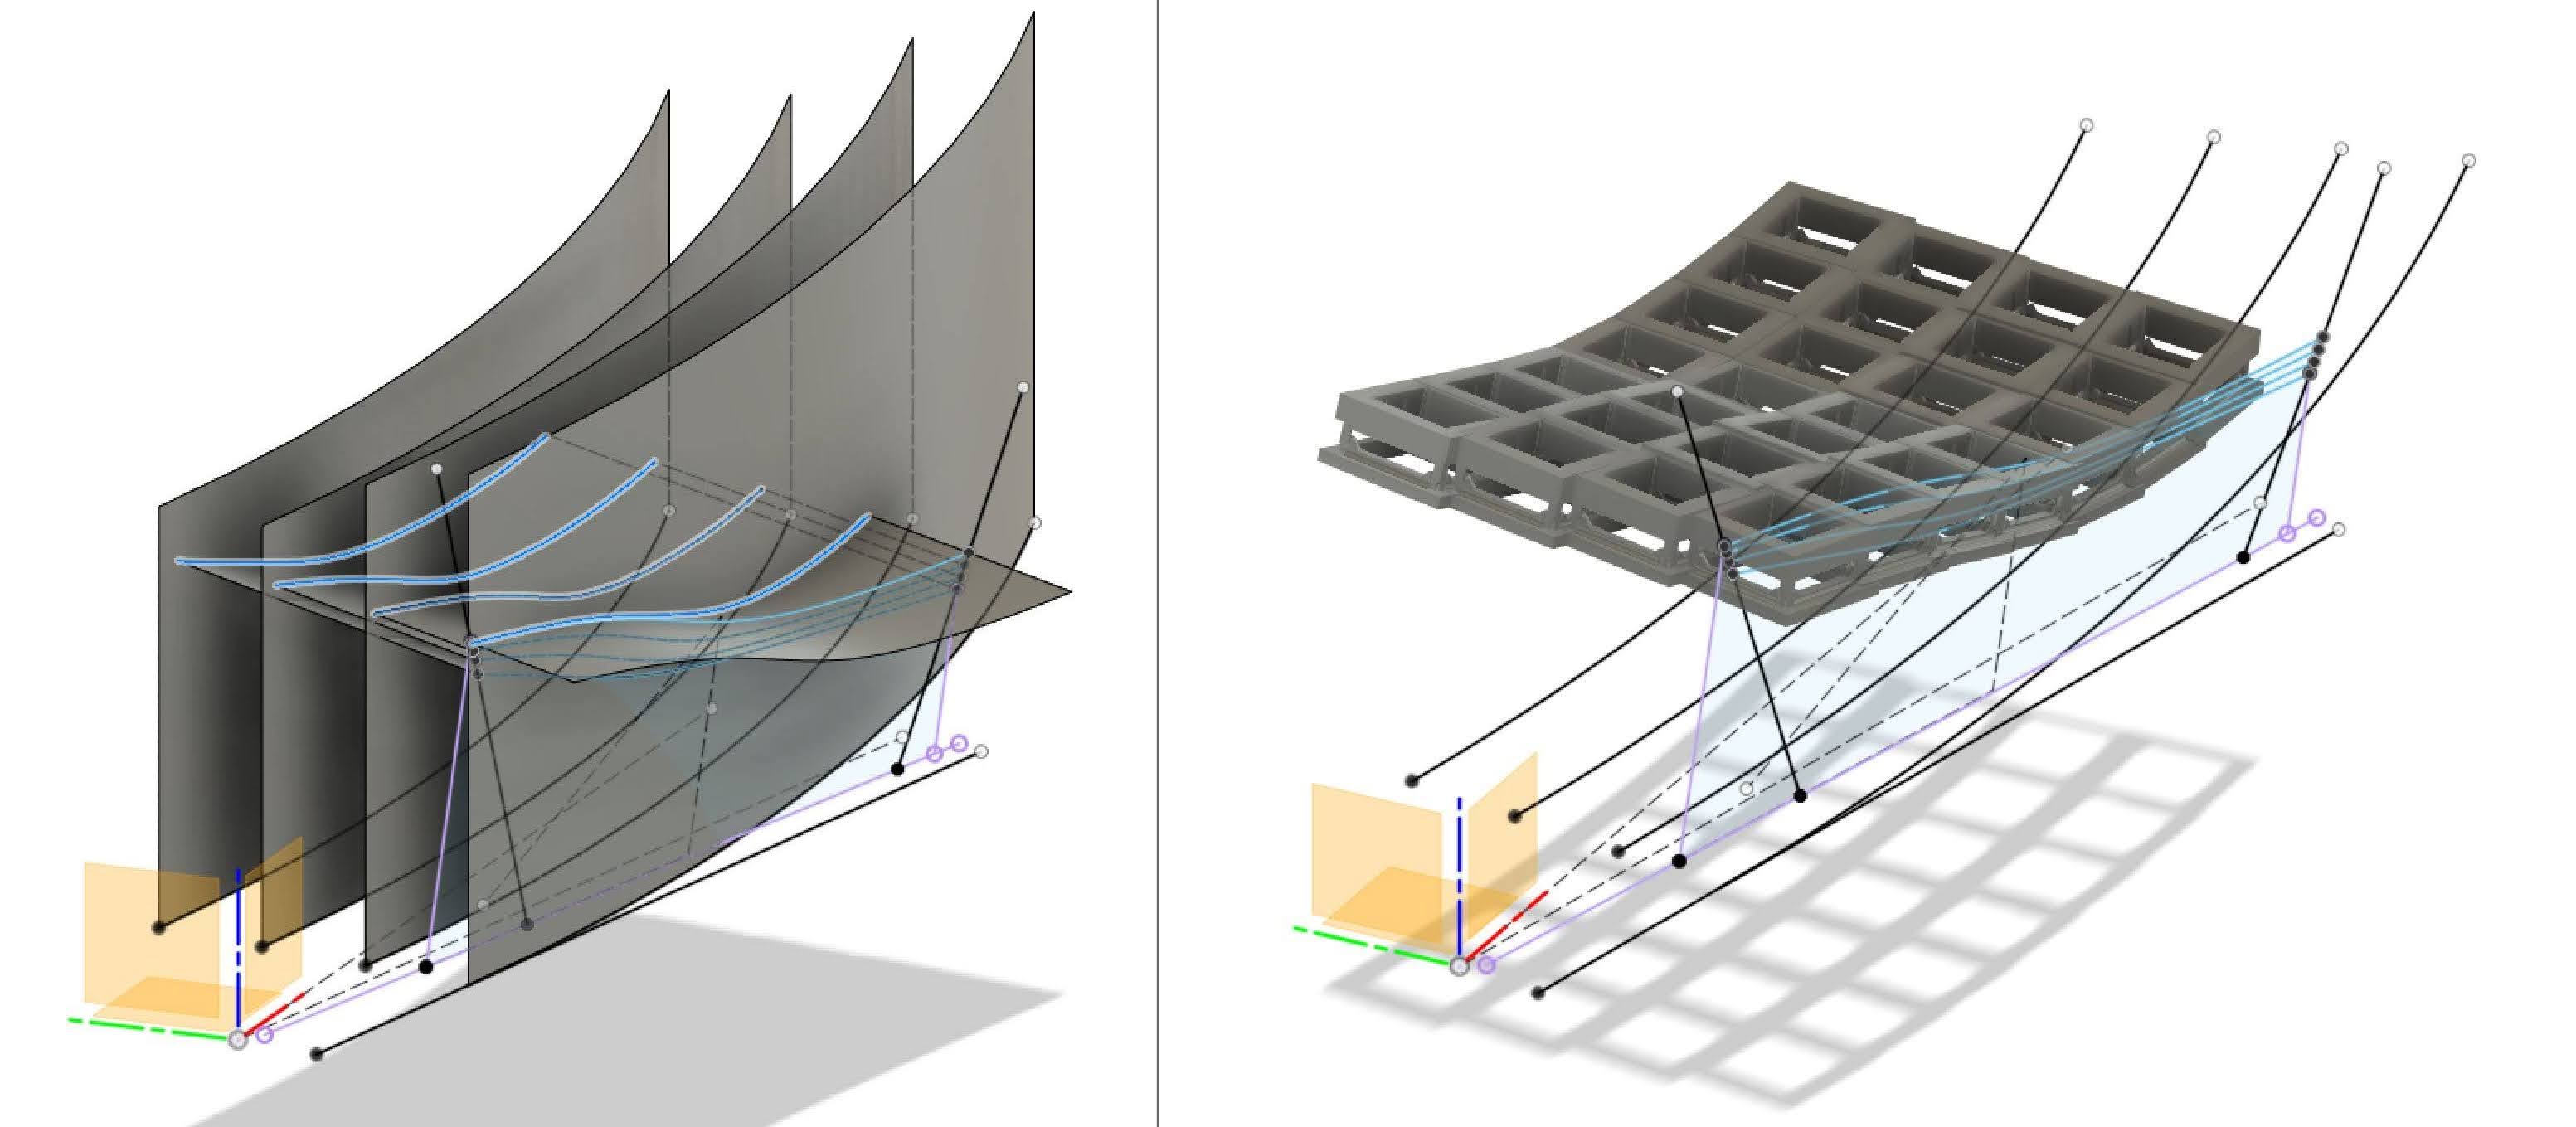
This worked really well. I’m quite proud. I could design the curves from top down and side on, looking at my reference 3D model and the quads I’d made earlier. The path along the intersection would put the keys in the right spots. I made 4 separate extrusions, one for each row, so that I could also use the align tool and set the initial rotation of the key holder for the pattern tool. I’ll admit to exaggerated some of the top down curves and increasing the dips under the D and K keys, so I can’t truly say the layout is the same as the 4K.